Sound Spiral Prototype – Chord Mode Added (12/09/2009)

Sound Spiral Prototype – Chord Mode from Noah King on Vimeo.

Now the sound spiral can be played with a magnetic wand. On the handle of the wand, the user can easily press and hold a button to enter “chord” mode. This plays the activated note plus two additional notes to make a 1 – 3 – 5 major chord.

Sound Spiral Prototype – Working Video (12/06/2009)

The sound spiral is working!

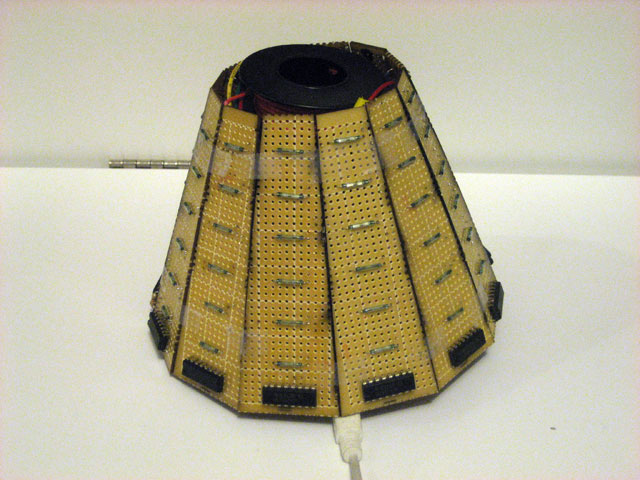
The recently assembled sound spiral.

The recently assembled sound spiral.


Project Overview – Anybody should be able to pick up an instrument and start playing. It shouldn’t take hundreds of hours of lessons before an instrument is learned and a player can enjoy the act of playing. Why not build a device that improves the experience of making music? The sound spiral does this by arranging notes in a way that makes playing harmonious chords and octaves simple to play; so simple that it happens spontaneously and accidentally.

Technology – The sound spiral is a hand-made prototype which uses an Arduino micro-controller to link an array of reed switches to a laptop computer. The laptop runs a music program that both plays the notes and visualizes the notes as they are played. A user holds magnets or magnetic wands to interact with the physical device and activate any of the 72 unique notes arranged in 3d spiral form.

What’s Next – An custom magnetic wand is still being made to make playing the sound spiral even easier. Multiple wands are available for two handed playing or for use by multiple players simultaneously. In addition, one wired wand will be made that connects to the base of the device and includes a push button on its handle. When pressed, the sound spiral enters “chord mode” and any single key press will active the sequence of notes in a 1 – 3 – 5 chord.


Sound Spiral Prototype – Working Video from Noah King on Vimeo.

Here is the sound spiral in action. After being assembled and tested, this is its first working video.

Sound Spiral Prototype – Construction (12/06/2009)

Building the sound spiral prototype was an arduous process, filled with lots of mistakes, insights, redos, and finally satisfaction. Here are a mix of photos documenting this process.


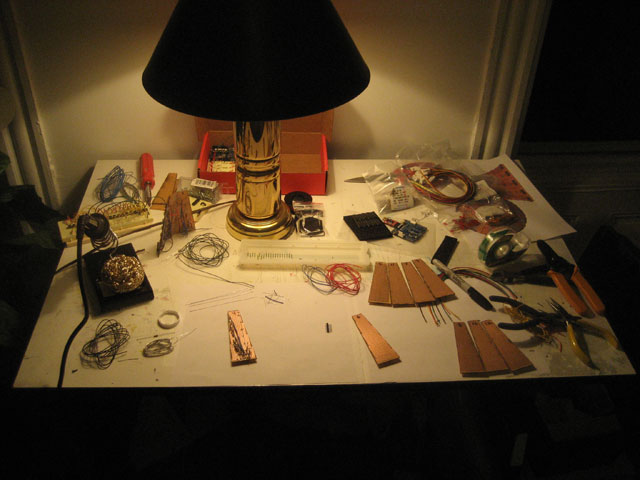
Shot of the working station.

Shot of the working station.


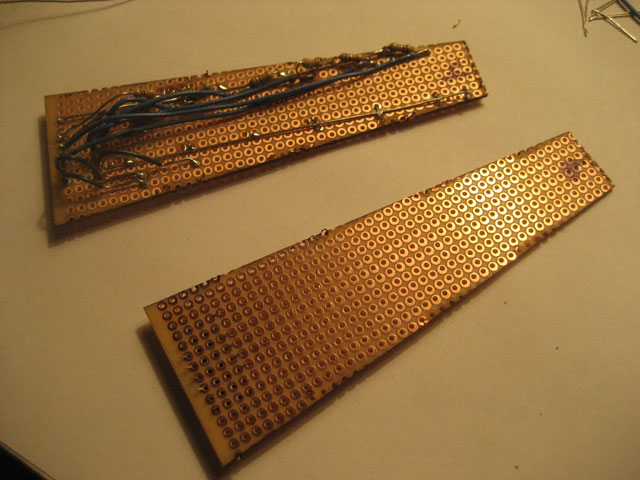
One single panel, with wired switches.

One single panel, with wired switches.


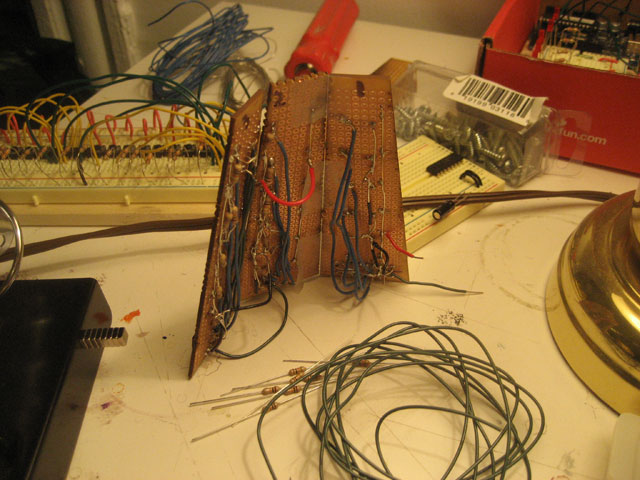
Three assembled panels.

Three assembled panels.


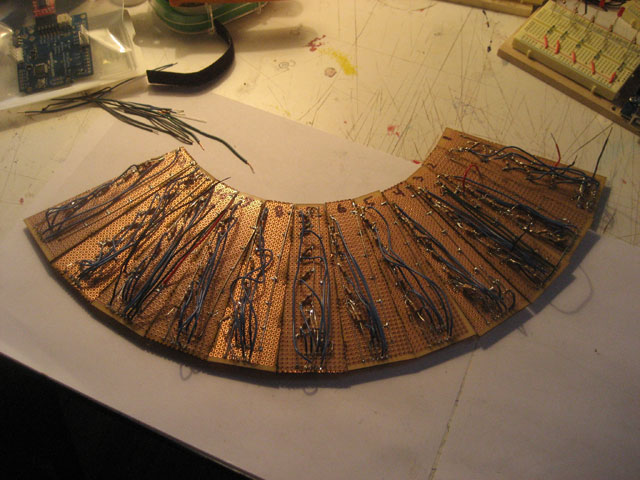
All 12 single panels next to one another.  Not yet interconnected.

All 12 single panels next to one another. Not yet interconnected.


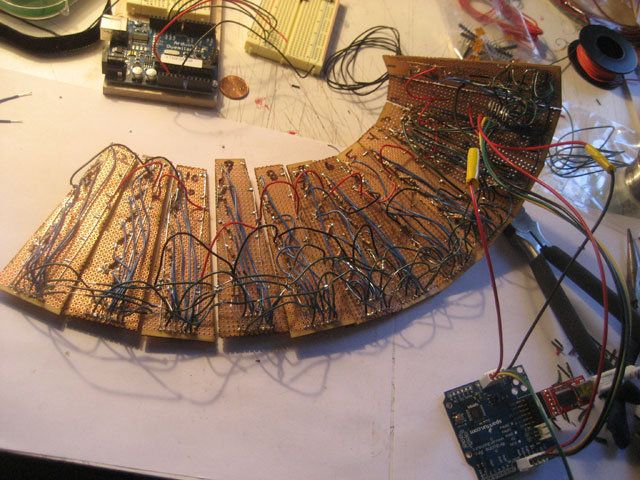
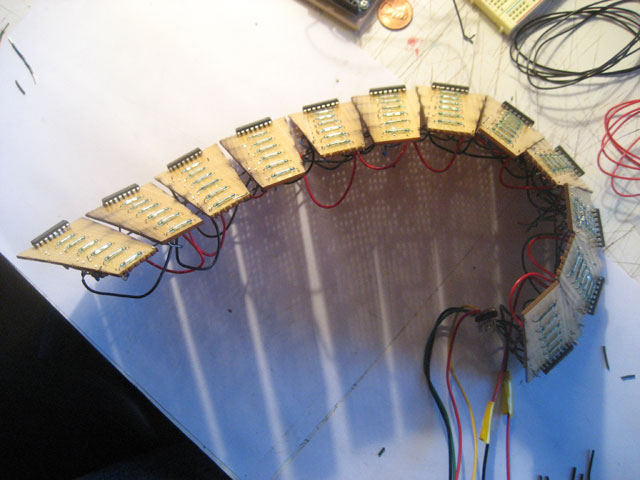
The full spiral, interconnected, tested, and ready to go.

The full spiral, interconnected, tested, and ready to go.


Completing the spiral, one fold at a time.

Completing the spiral, one fold at a time.

Sound Spiral Prototype – Testing Reed Switches/Shift Registers (12/06/2009)

There is a lot of wiring to do in order to have 72 unique switches on my sound spiral. My plan is to daisy chain 12 shift registers together, each one capable of inputting/outputting 8 unique addresses. Two of these addresses are wasted, as I only need 6 per panel, but still this will be quite efficient.

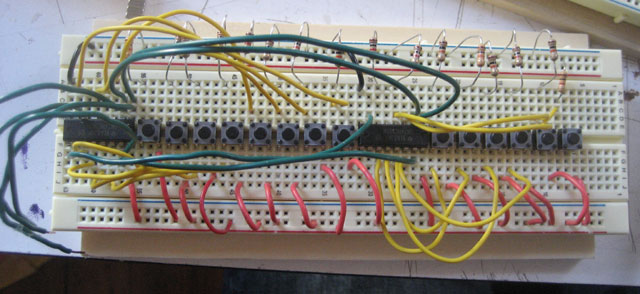
An initial test was done with 16 push button switches and 2 shift registers to see if I could get the arduino code working. Below is an image of this initial testing rig.


shift_register_test1


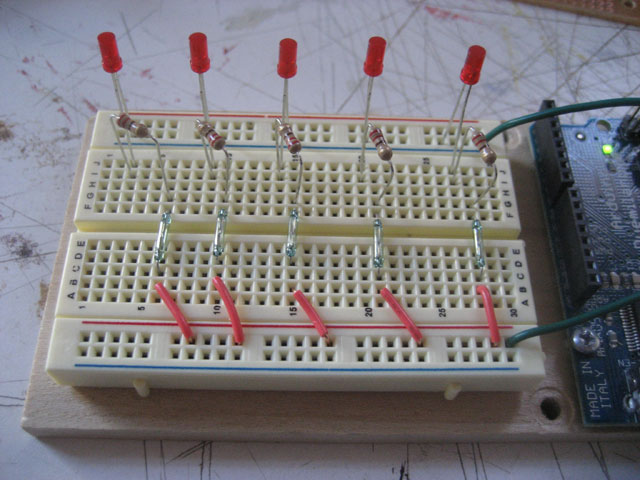
A second test was done to determine the minimum spacing between two reed switches in order to avoid activate multiple switches at one time. Below is the test rig and a short video.


reed_switch_test_1


Sound Spiral Prototype – Reed Switch Test from Noah King on Vimeo.


A third test was done to make sure a single panel from the 12-panel design was functioning. This was the first time I had ever broken free from the solderless breadboard and moved towards the soldered perf board, so there was a steep learning curve on how to manage wires and work efficiently. This first panel took nearly 3 hours to make, while the subsequent panels took more like one hour. Below is a video of this panel test.


Sound Spiral Prototype – Single Panel Test from Noah King on Vimeo.

Sound Spiral – Physical Prototype Version2 (12/06/2009)

After doing some user testing with a simple cylinder, I uncovered that it would be very difficult to interact with my cylindrical sound spiral device. It is near impossible for our arms and hands to press buttons in a cylindrical orientation without lots of moving of either our body or the cylinder. This made my previous design in desperate need of some rethinking.

I have elected to move from physical push button switches to instead use magnetic reed switches. This would allow the user to hold a magnet or magnetic wand and easily interact with the sound spiral in a natural, comfortable way. With the hand held above the device, all 12 angles of buttons could easily be accessed by merely twisting the wrist.

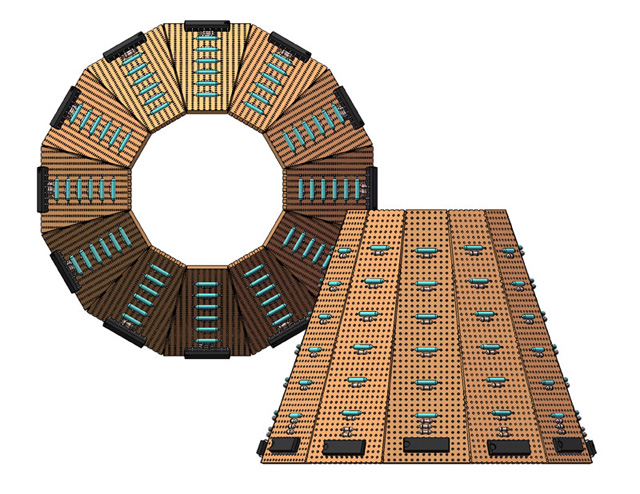
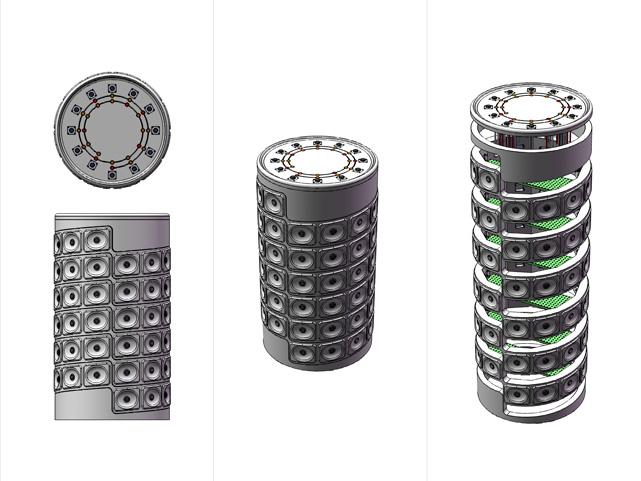
I have entirely rebuilt my Solidworks CAD data to reflect this design change, and now have version 2 of my physical prototype design. Below is an image that illustrates this new design.


soundSpiral_V2_ASSM_C

Sound Spiral – Physical Prototype Version1 (11/25/2009)

SW_ortho_1a


SW_detail_1


SW_detail_2


I have been working away on the design of my sound spiral. This physical device will connect through USB to a laptop running Processing or MaxMSP. The physical device is a media controller, and all sounds and color visualization will be made through the connected computer’s screen and sound system.

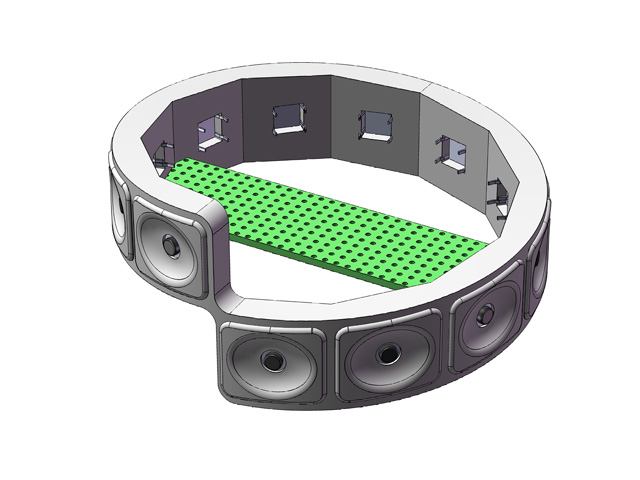
Currently the design is modular, made of single-octave spiraling rings that stack together. The prototype will have 6 octaves, each with 12 push button “keys”. Each ring has its own perf board inside, making it much easier to wire the buttons to each multiplexer, and then to the arduino stamp and powersupply on the base layer.

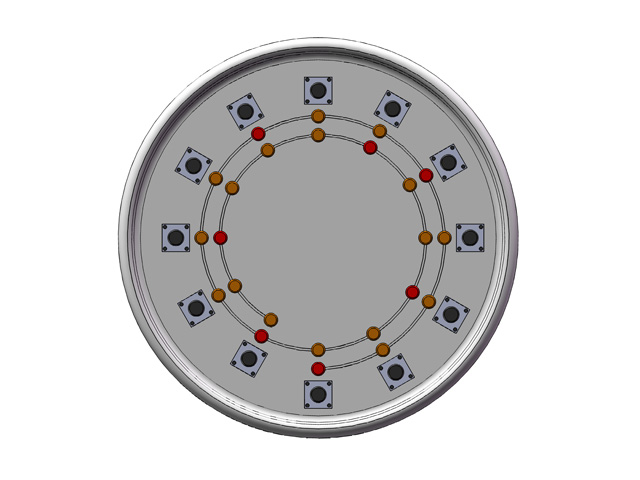
The cover has an additional 12 buttons and 24 LEDS that illuminate to build custom chordal relationships. The red LEDs indicate 1 -3 -5 -7 -9 -11 -13 tones, and the orange LEDs are all the in between notes, used less frequently in chords. Pressing the button will cycle through LED 1, LED 2, LED 1+2, OFF. After configuring the chord, then a single key press will play all the notes in that chord.

I’m hoping to find out, through user testing, whether this degree of customization is worth it or not, as it would be much simpler to use if there were only major and minor chords preconfigured. This version of the design is really being built for just that: user testing. Once there is a physical device to play, I hope to get a huge amount of feedback on the design and interface.

Later today I should get my parts in the mail, so I look forward to testing the serial communication between the Arduino and Processing, wiring 72+ physical buttons, resolving power issues, double checking fitment of parts, and finally sending out for the 3D CAD data to be rapid prototyped. Stay tuned for additional updates.
pComp Final Project Proposal (11/18/2009)

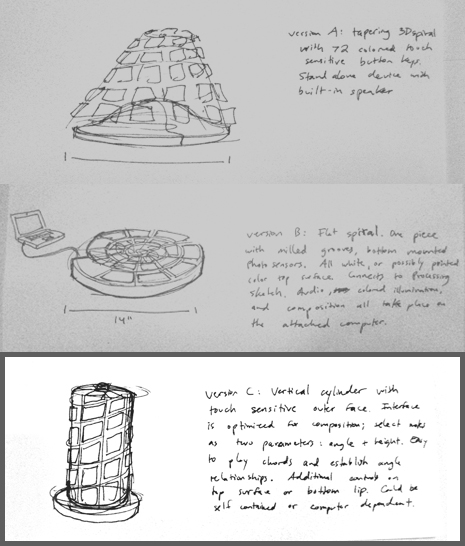
For my final project, I plan to build a physical media controller that can be used to create music and author musical compositions. Expanding on my concept of visualizing sound in a spiral form, the design will use a three dimensional spiral form to contain six octaves of notes. Each note will have an RGB LED and a digital push switch to activate and visually indicate a note being pressed/played. Below are some drawings that explore different form factors. The third concept has been selected as it lends itself to be hand held and will likely be more intuitive to “play.”

concept_sketches


To begin, I will make a flattened, simplified controller with only a single octave of notes. This will allow me to explore the coding, wiring, and functionality of the device.

Closer Robot – Demo of Build 1 (10/28/2009)
“Closer” Robot: Test drive of 200:1 motor gearing (10/25/2009)

Earlier in the semester I had an awful time trying to get a car to move using a DC motor. It turns out it was a gearing issue. Working with Melissa Clarke (who mastered the axle/wheel interface) and Michelle Temple (who assembled and debugged the gear box), we got our tractor moving like it was at a Monster Truck Rally.

Untitled from michelle Temple on Vimeo.

Solenoid Test (10/25/2009)

This video is too funny. Mostly, we were just really excited about the solenoid working : )

Untitled from michelle Temple on Vimeo.